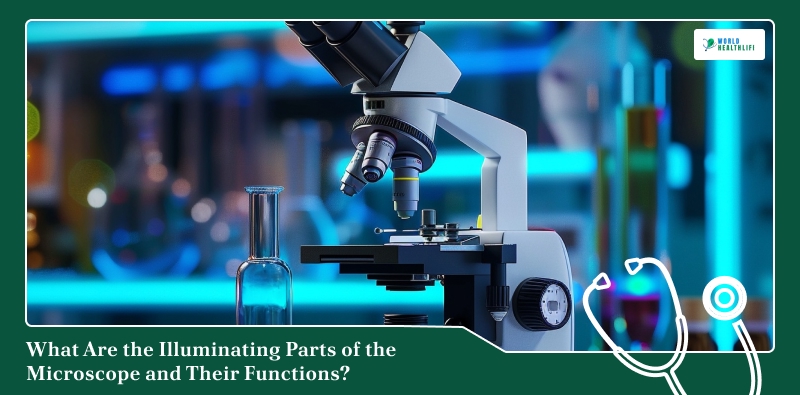
A microscope is basically a small-world translator. It takes structures that feel invisible in daily life and brings them into a view that the human eye can actually work with.
Still, magnification alone is not enough. In fact, without light shaped, controlled, and aimed with intention, the image becomes a vague smudge.
That is why people keep circling back to the illuminating parts of microscope. They want to understand why one view looks crisp, and another looks like fogged glass.
Why Illumination Fails Before Magnification Does
What is the first thing you check in a microscope when it stops working properly? I know, right? You check how well the magnification is working.
Usually, we think that more power means better illumination and improved focus on the object, but does it actually happen?
Well, no! In reality, the illumination wil not work if magnification is the problem with your microscope. Simply put, illumination has failed before your magnification begins to show signs of failure.
But what happens when there is no light or poor light, and magnification does not work properly? At first, you will get a more distorted visibility. Simply put, the contrast of the view fades sharply. However, you see a blurred view along the edges of the image. In simpler words, you see more light and less of the real image.
When Do People Make Such Errors?
That’s simple. You did not check the objectives. But you are trying to fix the illumination of your microscope. That’s a basic error that mkes you see blurred images with brighter-than-usual light.
Remember, after illumination failed, magnification will be of no additional use. After all, magnification will show you the result that illumination has already generated.
So, what Is the Solution Now?
That’s easy. At first, you stop trying to fix the focus. Instead, you must try to improve the light. Simply put, that’s a basic fix that will get your microscope up and running fast!
What Is Microscope Illumination?
Microscope illumination is the entire setup that provides light to the specimen. Also, it determines how that light behaves once it reaches the specimen. It is not merely about brightness. Rather, it is about contrast, edges, and texture.
Two broad illumination approaches show up again and again:
- One pushes light through the specimen, usually from below the stage.
- The other bounces light off the specimen, usually from above.
Although they are both lighting, they behave differently in practice. This changes how you prepare the slide and what you expect to see. Also, it determines how you adjust your controls when the image does not cooperate.
Transmitted Light and Reflected Light
In real lab routines, people mix up transmitted and reflected light. This split still helps you diagnose what your microscope is trying to do.
| Feature | Transmitted Light (Below the Stage) | Reflected Light (Above the Specimen) |
| Best For | Thin, transparent specimens such as tissues, cells, smears | Opaque or textured specimens, such as surfaces, electronics, and small organisms |
| What You “Feel” in the Image | Internal structure and layered detail, sometimes subtle | Surface detail and topography, often more immediate and high-contrast |
| Common Controls You Adjust | Condenser height, iris diaphragm, lamp intensity | Incident light angle, intensity, and sometimes aperture settings |
| Typical Failure Mode | Washed-out image from too much open aperture | Glare and hot spots when the light is too direct |
Overview of Microscope Components
Before drilling into illumination, it helps to place it in the bigger microscope body plan.
- Compound microscopes rely heavily on transmitted light. They typically have a condenser system beneath the stage.
- Stereo microscopes use reflected light. This is because they are used for three-dimensional objects. Essentially, the lighting is focused on surfaces rather than on transparency.
- Digital microscopes can be either. The sensor and software sometimes compensate for poor lighting.
At the outset, illumination sits at the intersection of mechanics and optics. The mechanical parts position the slide and align the lenses, while the optical parts shape what the light becomes by the time it reaches your eye or camera.
In fact, when illumination is tuned well, the objective gets clean information to work with. However, when it is off, even expensive optics struggle.
Illuminating Parts of a Microscope
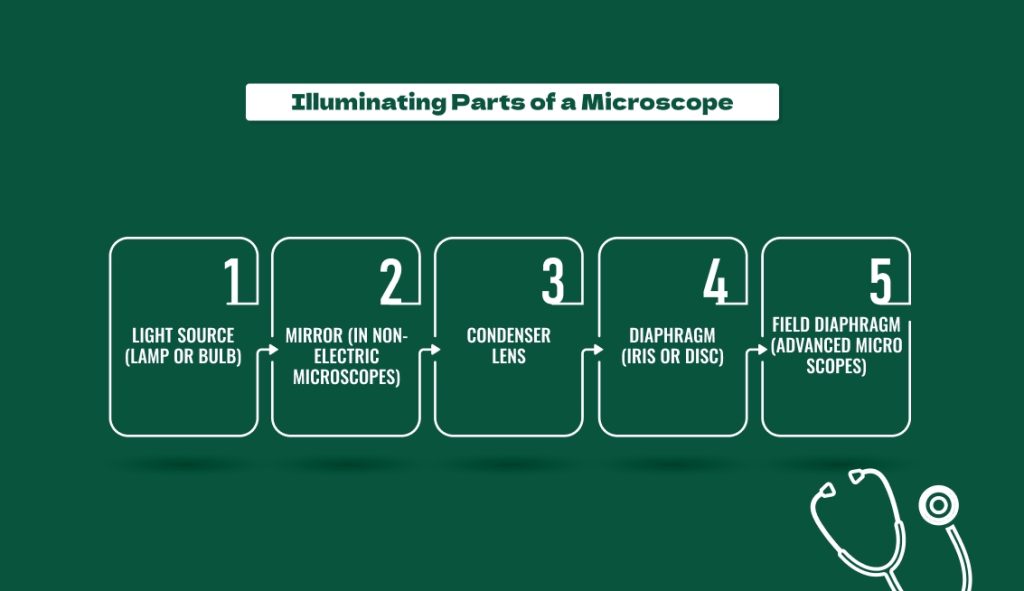
Primarily, illumination is a chain. One part produces light, another aims it, and another tightens or spreads it. Meanwhile, another restricts it so the image no longer looks flat.
In general, when people say the lighting is bad, they usually mean the chain has a weak link. Aldo, it might mean that the links are misaligned.
1. Light Source (Lamp or Bulb)
Of course, the light source is the origin point. In fact, the performance of the microscope depends on the type of source it uses:
- Older setups used tungsten or halogen bulbs. These used to run warmer and could shift color over time.
- Modern setups commonly use LEDs. This is because they are stable, cool, and consistent. It matters when comparing one field of view with another.
In those cases, consistency is necessary. The brain can adjust to many things, but it hates drifting illumination when you are hunting for fine boundaries.
Intensity matters as well. In fact, more light should mean more detail. Too much of it might wash out contrast, especially when the diaphragm is wide open. Therefore, start with moderate intensity. Then, shape the beam using the condenser and diaphragm rather than blasting the specimen with brightness.
2. Mirror (in Non-Electric Microscopes)
The mirror still shows up in basic teaching microscopes or field setups. Instead of producing light, it steals light from the environment and redirects it upward. It shows that direction matters as much as brightness.
In general, mirrors often have a flat side and a concave side. The flat side reflects light without trying to focus it much. The concave side concentrates light, which can help when the ambient source is weak. Moreover, it might create uneven illumination if you are not careful.
Basically, mirrors are portable and do not require power. Also, you learn about alignment hands-on. That said, they also make illumination less predictable.
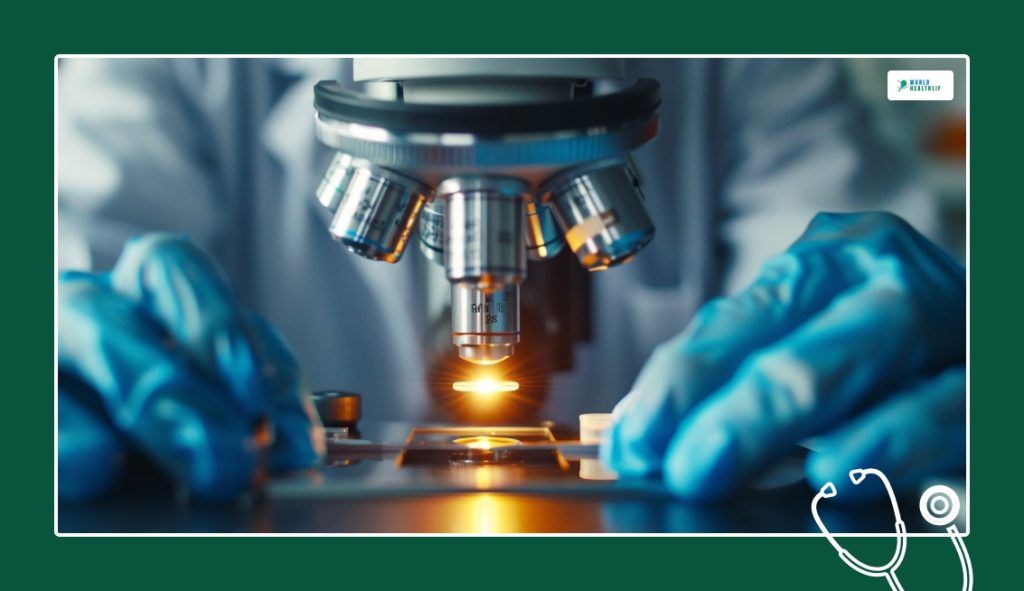
3. Condenser Lens
The condenser’s job is to concentrate light onto the specimen in a controlled cone, not merely flood the stage with brightness. Located under the stage, the condenser can be raised or lowered to change how tightly the light converges.
When it is positioned well, the specimen looks sharper, and the contrast improves. Also, the objective lens receives a more organized beam. When it is off, everything feels slightly out of focus, even when the focus knob is set correctly.
Meanwhile, a high-quality condenser supports higher numerical apertures. This matters when you are trying to pull out fine detail at higher magnifications.
4. Diaphragm (Iris or Disc)
The diaphragm is the control knob for how much light and what kind of light cone hits the specimen. The iris diaphragm is adjustable and smooth. You can open it gradually and close it down to increase contrast and depth of field.
Moreover, disc diaphragms come with preset holes, which are simpler but less flexible. Either way, the diaphragm changes the image’s resolution, contrast, and sense of depth.
Beginners mostly open the diaphragm too wide. This is because it makes the image brighter and easier to see. Then the image looks flat and washed, and they blame the focus or the slide. Closing the diaphragm a bit can suddenly make boundaries appear and textures separate.
4. Field Diaphragm (Advanced Microscopes)
The field diaphragm is not present on every microscope. However, when present, it affects uniform illumination. Also, it helps reduce stray light, which lowers contrast.
Also, the field diaphragm helps define the illuminated field. So, you are not lighting areas you are not even viewing. Moreover, stray light might lower image quality. The field diaphragm helps the microscope stop scattering light.
In setups closer to Köhler illumination, the field diaphragm improves evenness across the field of view. The payoff is a cleaner image across the whole circle. So, if you are doing documentation or comparing specimens, that uniformity is necessary.
Beginner Mistakes That Make Images Look Worse
I know you are trying to do what makes sense to you! However, most beginners can make these basic errors. I know beginners want quick fixes while they enjoy their microscopic views. But you need to avoid these common mistakes at all costs.
So what are these basic errors that they make? First, if you see the maximum lamp intensity, know that a beginner caused it!
I know bright feels helpful. But excess light flattens contrast. The image looks loud, not sharp.
Another issue is ignoring the diaphragm completely. Many users never touch it. Yet the diaphragm is one of the most powerful controls in the illuminating parts of microscope. A small adjustment there can reveal details that brightness alone hides.
Lastly, people forget that different slides require different levels of illumination. One setting rarely works for everything. Learning to adapt light to the specimen is part of learning microscopy itself.
How The Illuminating Parts Work Together
It helps to think of illumination as a clear path with a few simple steps. First, the light source creates the light. That light then moves through the condenser, which gathers it and focuses it onto the slide.
Next, the diaphragm shapes the light to improve contrast and depth. In some microscopes, mirrors or field diaphragms also help guide and clean up the beam before it reaches your eyes.
When you keep this sequence in mind, adjusting the microscope feels far less random. Instead of turning knobs out of frustration, you start making changes that yield clear, predictable results. Each control affects a specific part of the light path, so small adjustments begin to make sense.
This is where the illuminating parts of microscope work together as a system. If the image looks bright but dull, the issue is often the balance between the diaphragm and the condenser. If the brightness looks uneven, centering or field control may be off.
And if the image flickers, the problem is usually with the lamp or power supply. Thinking in terms of the system saves time because you stop guessing and focus on the real cause.
How Illumination Changes With Magnification
Illumination does not stay constant as you switch objectives. Each increase in magnification changes how much light reaches the eye and how narrow the usable beam becomes.
At low magnification, light spreads easily. The field looks bright even with modest intensity. At higher magnification, the system becomes more demanding. The condenser position matters more. The diaphragm position matters more. Small misadjustments suddenly become visible.
This is where frustration often starts. The image dims, and the instinct is to increase brightness. Instead, fine‑tuning the illuminating parts of the microscope usually works better. Slightly opening the diaphragm or raising the condenser often restores clarity without adding glare.
Magnification reveals structure. Illumination reveals meaning. They must be adjusted together.
Troubleshooting Common Illumination Problems
The following are some of the major illumination problems and simple fixes:
| Symptom You Notice | What It Often Means | Practical Fix That Usually Helps |
| Image too bright and washed out | Aperture too open or intensity too high | Lower lamp intensity, close the iris diaphragm slightly, and check the condenser height |
| The image is too dark, even at high intensity | Light not reaching the specimen efficiently | Open the diaphragm a bit, raise the condenser, re-aim the mirror or align the lamp, and clean the optics |
| Uneven brightness across the field | Misalignment or stray light | Center condenser, adjust field diaphragm if present, check lamp alignment |
| Glare or shiny hot spots | Illumination too direct for the specimen | Reduce intensity, change angle for reflected light, use diffusion if available |
Tips for Best Microscope Illumination
Good illumination works in steps, not in one move. Start with medium brightness so glare does not fool your eyes. Too much light obscures detail rather than showing it.
Next, position the condenser close to where your objective lens expects it to be. Do not rush this part. Small changes here make a big difference. After that, look at contrast, not brightness. Clear edges matter more than a bright field.
Use the iris diaphragm like a fine control. Open it until the details appear clearly. Then close it a little once the image starts to look flat.
A few simple habits help a lot. Clean the light path often, especially the condenser lens and the underside of the stage. Even small smudges can scatter light and create haze.
Always adjust illumination after placing the slide. Different specimens behave differently. If possible, aim for even lighting before searching for fine detail. Uneven light tricks your eyes into chasing things that are not real.
Applications That Depend on Good Illumination
In biological labs, illumination decides the following aspects:
- Distinguishing cell boundaries
- Spotting subtle staining differences
- Tracking microorganisms moving through a field.
In teaching settings, lighting makes a big difference in students’ attention. Moreover, in industrial inspection, reflected illumination exposes surface defects, scratches, micro-cracks, and texture differences. Meanwhile, in clinical contexts, illumination affects the visibility of features in smears and slides.
Hence, the microscope not only magnifies but also translates light interactions into information. If the light is wrong, the translation is wrong. That is why serious users treat illumination as part of the method.
Frequently Asked Questions
A lamp produces its own light and tends to give a stable output. Modern LED systems are a great example. Meanwhile, a mirror does not produce light at all. Rather, it redirects available ambient light into the optical path.
The condenser concentrates and focuses the light onto the specimen. Meanwhile, the diaphragm controls the aperture of the light cone. This changes contrast, depth of field, and perceived sharpness.
Poor illumination usually does not physically damage the specimen. However, it might compromise your interpretation.
LED lighting is good for beginners because it is stable, cool, and consistent. Although mirrors are fine for basic training, they add variability. This might distract a beginner from learning fundamentals. Hence, if you want to focus on technique, start with a reliable lamp.
Don’t Ignore Illumination
As you start paying attention to illumination, you realize the image quality is built from a chain of small decisions. It is about how light is produced, focused, restricted, and filled onto the field.
The payoff is better illumination. It makes the specimen easier to interpret and reduces the temptation to over-correct focus. So, treat the illuminating parts of microscope as a system you can tune, not a fixed setup you just accept.
Read More: