If you or a loved one are making preparations for hip arthroplasty, you may face the most pressing question in your mind. When will my life return to normal?
Well, there is nothing to worry about here!
Total hip replacement surgery is a highly successful, life-changing procedure designed to do the following:
- eliminate persistent joint pain
- correct structural damage from advanced osteoarthritis
- restore lost mobility.
However, because it involves the structural reconstruction of a major load-bearing joint, healing is a gradual process that unfolds over several months.
A successful outcome is heavily dependent on understanding your recovery timeline while adhering to your clinical team’s instructions.
Thus, this comprehensive, evidence-based guide provides a detailed look at total hip replacement recovery week by week.
In addition to this, it would be shedding light on milestones, physical limitations, and critical recovery secrets that are often left out of standard medical pamphlets.
The Macro Timeline: Factors That Dictate Your Healing Velocity
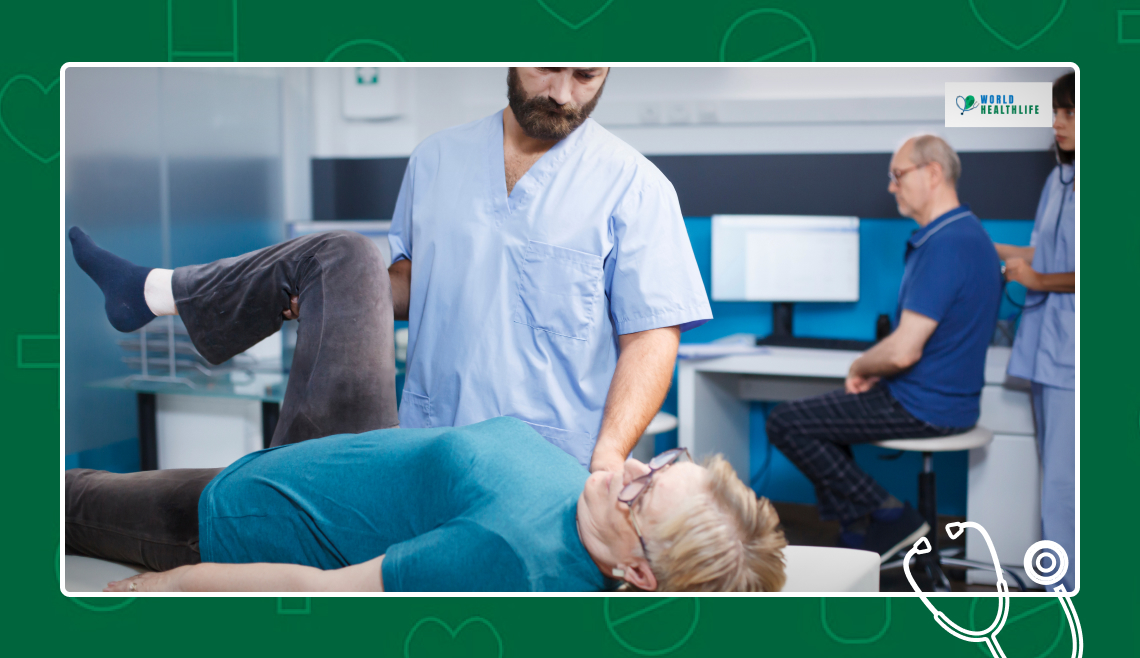
See, here is the thing you need to fully understand. No two hip replacements heal at the exact same rate.
Although a general timeline offers excellent baseline expectations, your specific recovery speed depends on a unique mix of surgical, biological, and age-related factors.
Clinical And Surgical Variables
The technical choices made by your orthopedic surgeon during the procedure significantly influence your early mobility restrictions and overall healing speed.
| Variable Component | Specific Option | Impact on Recovery Profile |
| Surgical Approach | Anterior | Incisions are made at the front of the hip, pushing muscles aside rather than cutting them. This leads to fewer early dislocation precautions and a faster initial recovery. |
| Surgical Approach | Posterior / Lateral | Incisions are made through the side or back, requiring muscle detachment. This necessitates strict movement rules for the first 6 weeks to protect the healing tissue. |
| Fixation Method | Press-Fit (Cementless) | Implants feature a porous surface that relies on natural bone ingrowth. This may require more conservative, partial weight-bearing early on. |
| Fixation Method | Cemented | The implant is secured with medical bone cement, allowing for immediate full weight-bearing right after surgery. |
| Pre-operative Fitness | High Baseline Strength | Patients with strong core and leg muscles prior to surgery generally experience faster rehabilitation, as their bodies adapt quickly to the new implant. |
Age-Stratified Recovery Metrics
Your body’s natural regenerative capacity changes over time. Understanding your age category helps you set realistic expectations for returning to regular physical activity.
| Patient Age | Initial Phase (Weeks 1–3) | Return to Light Routine | Full Biological Healing |
| 60-Year-Old | Rapidly transitions from a walker to a single cane; manages discomfort easily with minimal assistance. | 4 to 6 weeks. | 6 to 9 months. |
| 70-Year-Old | Steady progression using a front walker; requires consistent pacing and a dedicated support person at home. | 8 to 12 weeks. | 6 to 12 months. |
| 80-Year-Old | Intensive gait monitoring to ensure safety; high focus on fall prevention and building foundational confidence. | 10 to 12 weeks. | 12+ months. |
Total Hip Replacement Recovery Week-By-Week Breakdown
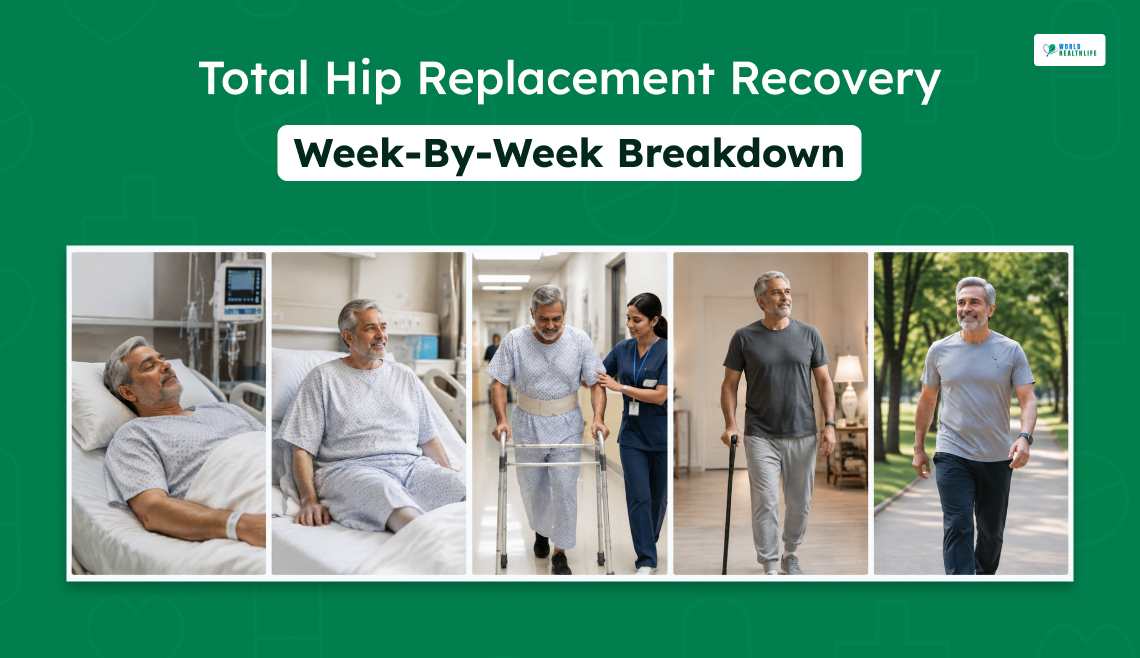
Below, you will get the total breakdown of recovery from a hip replacement, phase-by-phase.
Phase 1: The Acute Hospital And Early Home Window (Days 0 To Week 1)
This initial phase centers strictly on surgical safety, initial mobilization, and the protection of the fresh incision from external contamination.
Days 0 To 2: The Inpatient Hospital Stay
Your overall journey towards recovery begins right at the moment you wake up from anesthesia.
Just within hours of your surgery, a physical therapist will visit your hospital room. Then, you will get help for standing and taking your very first steps using a front-wheeled walker or dual crutches.
This early movement is vital because it stimulates blood flow and drastically reduces the risk of post-surgical complications such as deep vein thrombosis (DVT).
During these first 48 hours, nurses will closely monitor your vital signs, manage your pain using a precise medication schedule, and teach you deep breathing exercises to clear your lungs after anesthesia.
Days 3 To 7: Early Days At Home
After you have reached your hospital’s discharge criteria, you will move home. It is important to be extra careful with wound care during this time.
For example, moving from bed to the hallway and walking short distances.
The surgical wound should be kept completely clean and dry.
Sponge baths are required, and no normal showers until cleared by a healthcare provider.
At home, you should use a raised toilet seat and firm, high chairs so that your hips don’t bend beyond a 90-degree angle.
This week should be uncomfortable, but not severe, and should be controlled with your prescribed medication.
Critical Emergency Warning Signs
Seek immediate medical attention if you have sudden shortness of breath, acute chest pain, or severe localized heat, redness, and swelling in either calf.
Also, contact your surgeon right away if you see the following:
- Spreading redness around the incision edges
- Drainage that is yellow or foul-smelling
- A temperature above 101.5°F (38.6°C)
Surgeon Contact Triggers
Reach out to your surgical team promptly.
Do this especially if you notice:
- Spreading redness around the incision edges
- Active yellow or foul-smelling drainage
- A systemic body temperature climbing above 101.5°F (38.6°C)
Phase 2: Structural Tissue Rebuilding (Weeks 2 To 6)
In this four-week period, your body is actively healing soft tissues around the new implant.
Localized swelling and moderate stiffness are completely normal reactions as you gradually increase your daily physical demands.
Week 2: Suture Removal and Early Physical Therapy
Your first official post-operative checkup will be this week when your surgeon will usually take out your surgical staples or non-dissolvable sutures.
After the incision is completely closed and scabbed over, you will finally be allowed to take normal showers.
Most patients at this point are able to move on to a single point cane or crutches.
You will also start formal physical therapy exercises.
This will include passive range of motion exercises, ankle pumps, thigh squeezes and gentle heel slides to keep the joint moving.
Weeks 3 To 4: Reclaiming Everyday Independence
Deep surgical pain and baseline inflammation decrease markedly in the third and fourth weeks.
Simple daily tasks such as the following will start to give you a lot more freedom and independence:
- getting dressed
- making it up and down basic home stairs
- cooking simple meals will start to give you a lot more freedom and independence.
Your physical therapy will focus on active gait retraining to remove any pre-surgery compensatory gaits.
You will also work on standing hip abductor exercises to stabilize pelvis and start controlled step-ups on low platforms.
By the end of week 4, many patients are able to walk short distances without any assistance.
Weeks 5 To 6: Returning To The Driver’s Seat
At the six-week mark, your new hip joint is very stable.
If your surgery was on the left leg or drive an automatic vehicle and have quick reflexes, your surgeon may allow you to drive again.
Do that as long as you are not taking any narcotic pain medications.
Now you can sit comfortably on normal household sofas and chairs for long periods without deep aching.
Discomfort is easily controlled and is usually treated with simple over-the-counter products.
Your exercise program will increase to include low-resistance stationary cycling to help circulate joint fluid and single-leg balance exercises to develop hip stability.
Phase 3: Dynamic Strengthening And Stability (Weeks 6 To 12)
At this point, the shock of the surgical procedure is behind you.
Your physical attention is now completely directed at restoring a perfectly symmetrical gait and regaining muscle mass in your leg.
Weeks 6 To 9: Eradicating The Compensatory Limp
Now you should be walking without a cane on flat surfaces with a smooth stride length that is equal to your unoperated leg.
Any residual hip stiffness that occurs after sitting for long periods begins to melt away as the muscles adapt to the implant.
Muscle strength in your glutes and hamstrings will gradually return to normal.
For desk or sedentary jobs, you should be able to return to work during this period.
Weeks 10 To 12: Advanced Coordination And Graduation
By the end of the third month, you will be able to do the following:
- Walk long distances
- Climb stairs without needing to grip walls for support
- Walk on uneven outdoor surfaces without difficulty
The soreness after physical therapy is minimal.
Structured clinical physical therapy ends at this stage for many patients, and they are transitioned to an independent, long-term home exercise program.
If you have a physically demanding occupation, you may be allowed to return to work with a modified job.
For example, it can be:
- Nursing
- Manufacturing
- Construction
Phase 4: Long-Term Biological Integration (Months 3 To 12 And Beyond)
Biological recovery is a process that takes time.
Your bone is remodeling and forming a permanent connection with the porous surfaces of your prosthetic implant, even if you feel “normal.
Months 3 To 6: Restoring Endurance
At this time, any residual deep tissue soft swelling is completely gone.
Your local muscular endurance is restored to peak levels, and you won’t feel tired at night after a long day of activity.
Low impact recreational activities such as swimming laps, outdoor road cycling and light gardening are safe to resume.
Long journeys and long flights are fine, as long as you take short walking breaks to stretch the joint.
Months 6 To 12: Achieving Maximum Strength
The bone-implant interface is at its peak structural strength at 1 year.
90% of hip replacement patients say they have no pain or pain is minimal when they experience sudden changes in weather.
Now you can play higher-intensity, lower-impact sports like doubles tennis, golf and moderate hiking without fear.
Your surgeon might want to perform a routine checkup, with imaging, one year after surgery to confirm the long-term health and position of the joint.
The Hidden Truths Of Hip Rehabilitation: Overlooked Realities
Typical recovery articles don’t really mention the day-to-day issues of living with a healing hip.
If you know what these hidden truths are, you can prepare for the recovery process to be much smoother.
The Anatomical Rules Of Safe Sleeping
If you sleep the wrong way in the first month, the surrounding muscles will be stressed and the implant may become dislocated.
Strict positioning rules will help to protect your new joint during healing.
| Sleeping Position | Permitted Timeline | Required Orthopedic Support Protocol |
| On Your Back (Supine) | Days 0 to Week 6 | • The safest position • Keep your legs slightly apart (abducted) • Place a firm, contour pillow between your knees • This helps prevent your legs from accidentally crossing or twisting inward while you sleep |
| On the Unoperated Side | Weeks 3 to 6+ | • Permitted only if you place a thick, double-stacked pillow barrier between your knees • This support keeps your top leg from dropping forward and pulling the healing hip into a dangerous, twisted angle |
| On Your Operated Side | Weeks 6 and Beyond | • Allowed once the incision has completely healed • Also, if you can comfortably bear weight on that side without pain |
| On Your Stomach (Prone) | Generally Prohibited | • Avoid this position during early recovery • Lying flat on your stomach can force the hip into extreme hyperextension or rotation • This puts unnecessary stress on the front of the joint capsule |
The Psychological Milestone: “Post-Op Blues” And Fatigue
Major joint replacement surgery can have an emotional impact as well as a physical impact.
Moreover, planning for these milestones helps to prevent discouragement during the process.
| Common Emotional & Physical Impact | Underestimated Source (Why it happens) | Coping Strategies (What to do) |
| Week 3 Energy Crash | Body channels massive caloric energy into bone remodeling and muscle repair. | • Schedule two daily rest windows. • Boost lean protein and complex carbs. • View fatigue as a sign of deep healing. |
| Neurovascular Depression (Weeks 2–4) | Fragmented sleep from fixed positions combined with a temporary loss of independence. | • Track small weekly wins (e.g., distance walked). • Keep a recovery journal to see visual progress. |
Lifetime Joint Preservation Rules
Today’s hip implants are extremely long-lasting, lasting 15 to 20 years on average.
But to protect that investment, it’s important to know what moves preserve the joint and what moves lead to wear and tear.
Activities To Avoid: High Stress/Impact
- Long-distance running or jogging on pavement
- High-impact sports that involve jumping or landing forces, such as basketball or volleyball
- High-risk contact sports such as football, rugby, skiing
- Forceful heavy lifting or deep squatting without assistance
Encouraged Activities: Low Stress/Fluid
- Lap swimming or water aerobics which is good for zero-impact resistance training
- Smooth stationary or road cycling
- Flat surface hiking, walking, and low-impact elliptical training
- Light gardening
- Light dancing
Summary Matrix: The 1-Year Journey At A Glance
| Phase Timeline | Principal Objective | Primary Assistive Device Need | Expected Pain Level |
| Week 1 | Protect the incision, manage acute pain, and safely establish basic indoor mobility. | Front-wheeled walker or dual orthopedic crutches. | Moderate to High (well-managed with prescribed medications). |
| Weeks 2–6 | Re-establish an even walking gait, rebuild muscle memory, and return to light everyday tasks. | Transitioning to a single point cane, then walking fully independent. | Low to Moderate (mainly muscle soreness after physical therapy). |
| Weeks 6–12 | Maximize localized muscle strength, balance, and safely return to a standard work routine. | Completely independent walking with no assistive tools. | Minimal (occasional evening stiffness or mild weather aches). |
| Months 3–12 | Complete long-term tissue integration and return to low-impact sports. | None; full reliance on a strong, natural stride. | Zero to Trace (the new joint feels stable, reliable, and pain-free). |
Navigate The Journey To Recovery
The total hip replacement is a process of incremental steps, not quick fixes.
So, the first week is about safety and taking the important first steps.
Then, the following weeks are about strengthening muscles.
Moreover, the months to come are about regaining confidence and returning to the things you love to do.
In conclusion, to set you up for a highly successful, active, and pain-free life ahead, you need to ensure three things:
- Your physical therapy exercises
- Home environment
- Your ability to pace yourself through each stage of recovery
Disclaimer: The information provided in this article is for general informational purposes only. It does not, and is not intended to, constitute medical or health advice. Please consult a qualified healthcare professional for medical guidance or expert health assistance.
References
- M Klapwijk, L. C., C Mathijssen, N. M., Van Egmond, J. C., Verbeek, B. M., & W Vehmeijer, S. B. (2017). The first 6 weeks of recovery after primary total hip arthroplasty with fast track: A diary study of 94 patients. Acta Orthopaedica, 88(2), 140. PubMed Central.
- Cleveland Clinic. (2026, September 11). Hip replacement surgery. Cleveland Clinic.
- Amack. (2026, February 15). Im 53 what is post op recovery of Total Hip Replacement [Online forum post]. Mayo Clinic Connect.
- NHS.UK. (2026, March 17). Recovering from a hip replacement. nhs.uk.
- Hip Replacement Recovery: Q&A with a Hip Specialist. (2026, March 20). Johns Hopkins Medicine.